1. Custom Field 자동 편집을 어떻게 하지?
우리 Jira 이슈 티켓에는 "개발자" 라는 이름의 custom field 가 있다.

모종의 필요성에 의해 생긴 필드인데, 문제는 이 필드 설정하기가 더럽게 귀찮다;
그래서 이슈의 상태가 변하면 자동으로 개발자가 세팅되게 자동화 시키려고 하니
커스텀필드라서 설정이 안된다 ㅋㅋ
https://support.atlassian.com/cloud-automation/docs/advanced-field-editing-using-json/
Advanced field editing using JSON | Cloud automation Cloud | Atlassian Support
The More options field on automation actions in Jira Cloud allow you to specify a valid JSON object reference and edit issue fields. Learn how this works.
support.atlassian.com
이 문서에 따르면, 커스텀필드의 경우 JSON 으로 직접 필드를 조작해줘야 한다고 한다.
{
   "update": {
        "description": {
            "set": "a new description"
        },
        "labels": [{
                "add": "test-label"
        }]
    },
    "fields": {
        "summary": "woohoo! a new summary"
    }
}
이렇게 말이다.
(잠깐 설명을 하자면, update.<fieldname>.set 은 덮어쓰기, update.<fieldname>.add 는 덧붙이기, fields.<fieldname> 또한 덮어쓰기라고 이해하면 된다.)
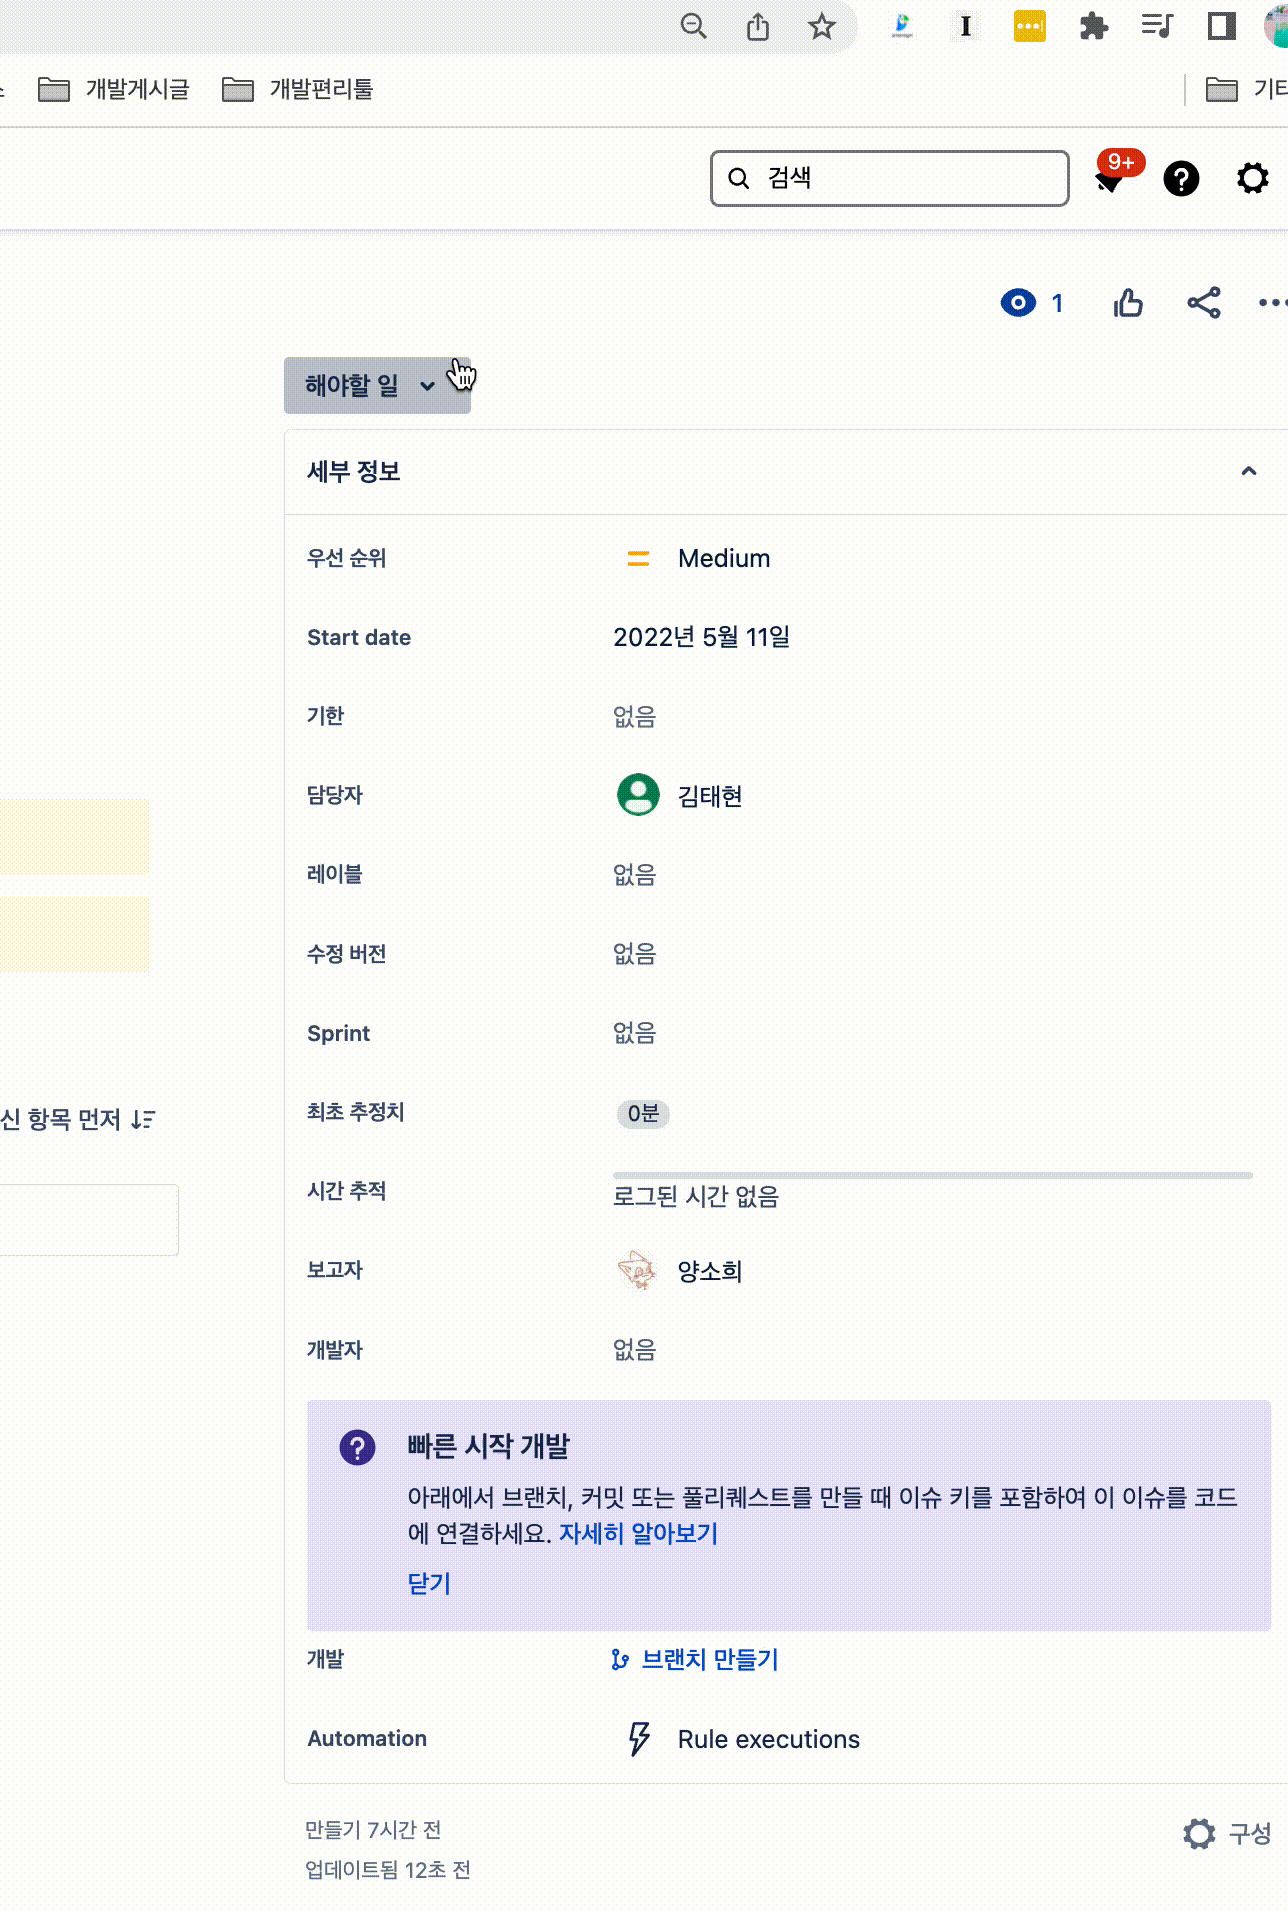
문제는 우리 필드이름이 한글이라는 사실이다!
{
  "fields": {
    	"개발자": "soyap"
    }
}
이렇게 한글로 적으면 왠지 안될거 같았다...
그래서 field id 를 알아내서 걔로 적용하기로 했다.
2. API를 통해 Field id 알아내기
그럼 이 field id는 어떻게 알아내는가?
Jira API 를 통해 알아내야한다.
근데 API를 쓰려면 API key부터 발급 받아야 된다.
발급 받는다.
https://id.atlassian.com/manage-profile/security/api-tokens
Atlassian account
id.atlassian.com
계정 설정 > 보안 설정 > API 토큰 에서 만들 수 있다.
이제 우리 프로젝트의 필드들을 알아보자.
curl --request GET \
  --url 'https://your-domain.atlassian.net/rest/api/3/field' \
  --user 'email@example.com:<api_token>' \
--header 'Accept: application/json'response 에서 id 가 customfield_10055 라는 것을 알아냈다.
3. 이제 진짜로 Json 으로 Custom Field 자동 변경 설정하기
나는 "이슈의 상태가 변할 때, 담당자를 개발자로 설정"하고 싶었다.

{
    "fields": {
        "customfield_10055": [ { "id" : "{{assignee.accountId}}" } ]
    }
}
쨘.
이리하면 customfield_10055 의 id를 담당자의 accountId 로 바꾸는 설정이 완성된다.
4. 번외 - Smart value 로 필드 값 가져와서 조작하기
위에서의 {{assignee.accountId}} 와 같은 변수(?) 를 smart value 라고 부른다.
https://support.atlassian.com/cloud-automation/docs/find-the-smart-value-for-a-field/
Find the smart value for a field | Cloud automation Cloud | Atlassian Support
Can't find the smart value for your issue field? Find out how to find the right smart value in your Jira Cloud instance.
support.atlassian.com
생긴걸 보면 알겠지만, 이슈 내의 필드 값을 변수처럼 가져와 조작하며 사용하는 것이다.
나는 안해봤지만, {{issue.summary.toLowerCase().substring(0, 10).concat("!!")}} 와 같이 값을 조작하는 함수도 내장되어 있다고 한다.
https://support.atlassian.com/cloud-automation/docs/what-are-smart-values/
What are smart values? | Cloud automation Cloud | Atlassian Support
Use smart values to access and manipulate issue data, and make your Jira automation rules more powerful. Find out how.
support.atlassian.com
내 이슈티켓의 smart value 이름을 쉽게 알 수 있는 방법이 있다.
curl --request GET \
  --url 'https://your-domain.atlassian.net/rest/api/2/issue/{ISSUE-NUMBER}?expand=names' \
  --user 'email@example.com:<api_token>' \
  --header 'Accept: application/json'
이런 녀석을 요청하면
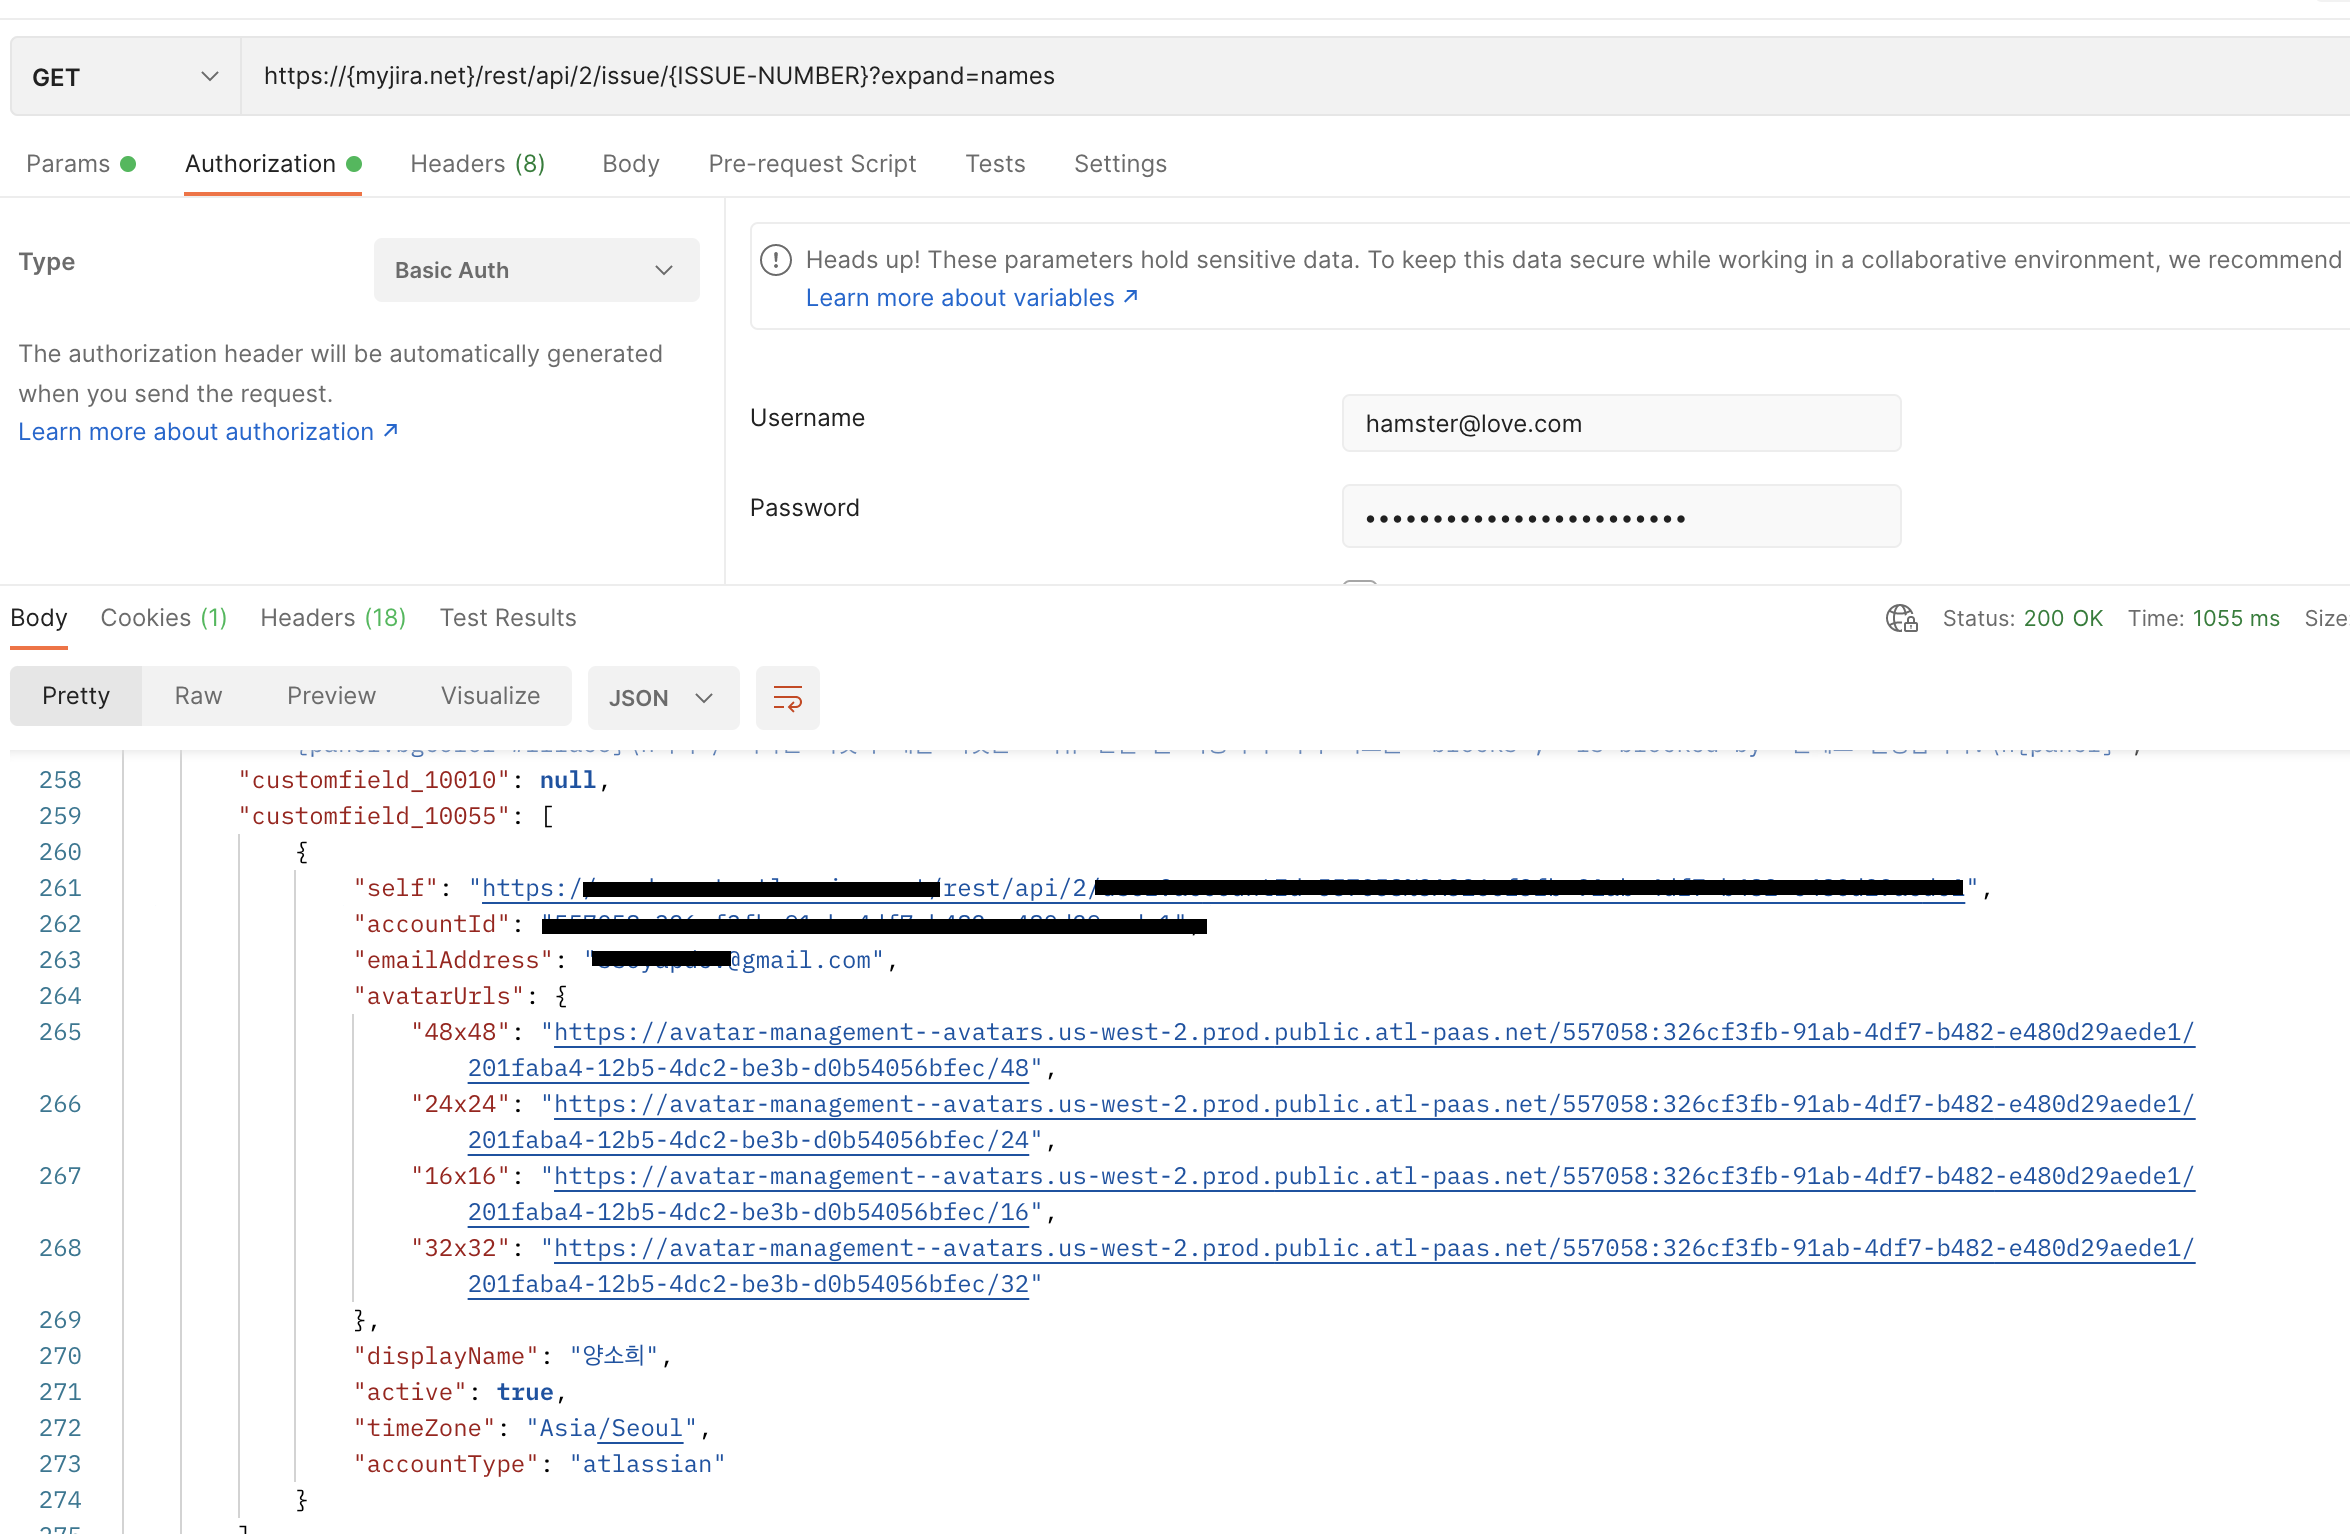
이런 응답이 온다.
적당히 {{customfield_10055.displayName}} 처럼 가져다가 사용하면 된다.
끗.
'TIL' 카테고리의 다른 글
| [TIL] 시간 복잡도와 알고리즘 문제 풀기 (0) | 2020.10.28 |
|---|---|
| [TIL] Hibernate PK 생성 전략 (2) | 2020.10.15 |
| [TIL] SOMA CAMP 1일차 - 최백준 알고리즘 (0) | 2020.10.14 |
| [TIL] Spring boot - MySQL 연동 삽질 (0) | 2020.10.13 |


